Monday
Jun062011

Google Doodles Quiz - Part 6...Inventions & Discoveries

In this prior post we briefly described Google Doodles and had a quiz.

Now it's time to guess the Inventions and Discoveries whose dates were recognized with a Doodle:

#1

#2

#3

#4

#5

#6


---------------------------------------------------------------------------------------

Answers below:

---------------------------------------------------------------------------------------


#1    Discovery of X-Rays
#2    Invention of the Laser
#3    Discovery of Buckeyballs
#4    Invention of the Large Hadron Collider
#5    Invention of the Bar Code
#6    Discovery of DNA

Sunday
Jun052011

Basecamp, Finland style

We have already posted a bit about our winter week adventure in Finland, with highlights such as building an igloo and going snowmobiling (with more posts to come, including sledding with huskies!).  This post will briefly cover the "basecamp" aspect, with some unique Finnish drinks...

We stayed at "Basecamp Oulanka".  This is a small collection of lodges just outside Oulanka National Park.  The park sits on the border with Russia, a few kilometers south of the Arctic Circle.

One gets here through Kuusamo airport.  Locals say "Welcome to Lapland" but Kuusamo is technically part of Oulu province (on it's northern edge) just below the formal province of Lapland.  On the map above, the rest of Finland above Kuusamo is all Lapland province and the cultural region extends into Sweden too.

 
Basecamp sits on a small rise, perhaps 100m from the shore of a lake.  Two 2-story buildings house the guests -- each building has only 8 rooms (you see the top story in the left photo, below).  Every room has a balcony that looks into the forest towards the lake.... although you can't see water in Winter.


The central building functions as the equipment center and "lobby" facility.  In Winter, each guest heads to the lower level to be issued warm boots, socks, fleece long underwear, snow pants, heavy jackets and gloves.  The upper level has the camp reception, kitchen, and a common/dining room.


The photo above/right is from breakfast -- everyone is decked out and ready to go.  In the evening, however, things get more relaxed and move in front of the fireplace!  It's a nice stone hearth with plenty of room to put your feet up after a tough day in the snow.


Frau A and I like to try local fare, and around the fireplace it seemed appropriate to get to know Finnish drinks.

The first is from a company called Jellona.

Jellona make two kinds of schnapps -- one flavored with anise (the signature flavor in black liquorice) and the one pictured here that is flavored with tar.  Yes, tar.  Notice the barrel on the label?

It has a strong, smoky, "tarry" (how else to describe it?) character.  Definitely puts hair on the chest.  A number of people in our group gave it a shot... not the crowd favorite after that.  Perhaps it's an acquired taste?

The anise version was more predictable - those that like black liquorice flavor loved it, those that don't, didn't.  Frau A said that her father would probably really like the anise version...


Another evening we learned about Finnish cut brandy.  Our guide (who doubled as bartender) explained that in wartime, brandy was in short supply so Finns would cut it with vodka.

One star indicates one part brandy to two parts vodka (1/3).  Three stars means three parts brandy to one part vodka (3/4, a higher quality).

We tried a one star variety.  Not bad.  The mix is strange at first, but it works.  I'll bet most people would prefer this to straight vodkas.

Jaloviina is a popular  brand -- Wikipedia's photo for cut brandy, plus a Facebook page!

Wikipedia notes that vodka-cut-brandy is also common in East Germany as general practice.  Interestingly, these versions are not graded -- must be the Russian influence, because Germans tend to control products closely.

I've seen Goldbrand (a German version) in stores and may have to try it.  One could cut their own as well...


 Finally, we sampled the Lapponia brand of Finnnish liquers.

These are sweeter and thicker than schnapps, with some unique flavors too.  We tried cloudberry (not bad!) but blueberry, lingonberry, and buckthorn are also available!

We brought a bottle of cloudberry back (actually, Frau A snuck it home and surprised me for my birthday).  In addition to apertif format, we will try it as an ingredient with desserts too.


At the end of each day, most people were quite tired from whatever activity kept us romping through the snow for hours, and after a hot meal & drinks we were content to enjoy the sunset.  It seems to be a great options for Summer vacation too, with white water rafting.  We'll see...


Saturday
Jun042011

Morning Observations

This morning we went for a really early (predawn departure) morning photowalk through Munich's Olympiapark.

After a few hours of walking, we stopped at Woerner's for a nice filling weisswurst breakfast. Munich at 8am on a weekend is pretty wonderful - there is some movement, but most people are still in bed and it's a peaceful time. It's also early enough to get prime seats in some of the restaurants and cafes!

As their outside tables weren't out yet, we secured a prime table by an open window overlooking Marienplatz (Woerner's cafe is a level up).

You'll always see some strange things if you watch the people on Marienplatz long enough. This morning, it was a man with a small trailer behind his bike. From our distant view, the trailer looked like a glass display case with a statue of Jesus.  He then parked his bike and trailer in front of the Rathaus, set up a video camera and began recieving guests.

Luckily Herr J had his 600mm effective lens and we could spy on the proceedings down below. Definitely not Jesus, but we're still at a loss for why this guy was towing around a glass cases with a sawdust statue of a woman in it.  He seemed to have several friends meet him out there, so there must have been some significance and interesting back story...

What we did realize was how handy Herr J's stealth lens is....Since he's using the  micro 4/3 standard, his 600mm lens weighs in at 1 lb and a tiny fraction of the price of the 11 lb, $10,000 behemoth lens Nikon offers for my camera. Plus, it fits easily in the man purse!

Friday
Jun032011

Silly Goose!

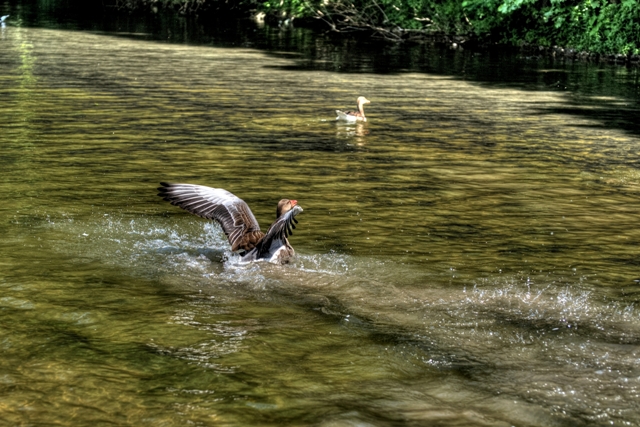
We've been visiting the English Garden the past few weekends to see the babies growing.  Last week we saw some unusual behavior from a Greylag Goose near the Seehaus.


First we see him happily swimming with his family.


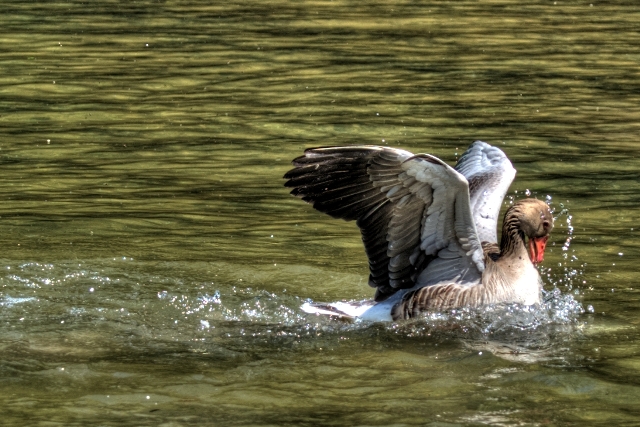
But then another goose catches his eye and he quickly turns to go after it.


A goose snapping at something was not unusual in itself. These guys can be pretty aggressive with other birds and will persistently beg you for food by nipping the back of your knee to "let you know" that they want bread. They'll also eat it from your hand without hurting you - they're much rougher on other birds than on people. Obviously they understand "don't bite the hand that feeds you" quite well!


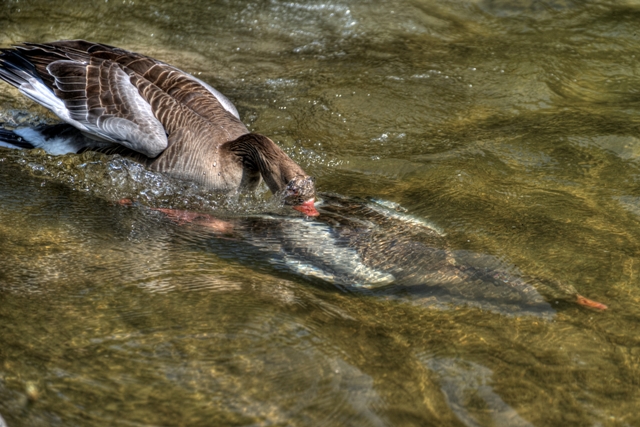
What was unusual was first, that the other goose swam underwater to evade attack


and second, how aggressively the attacker continued to pursue him, trying to catch and bite him.


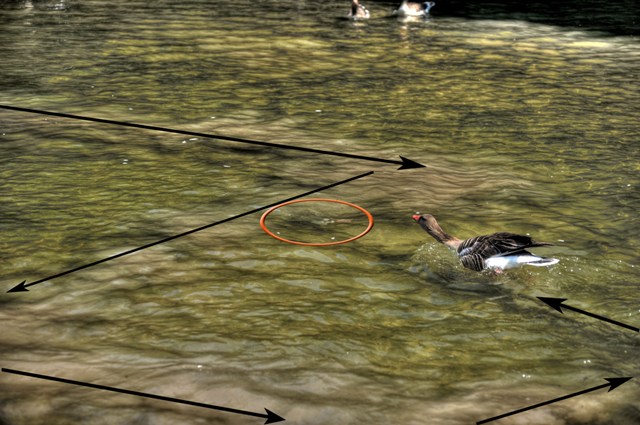
By this point, they've zigzagged back and forth in front of us for a seemingly long time (probably under a minute), with the victim spending most of the time fully underwater (circled in orange) and kicking up a trail of muddy water. 


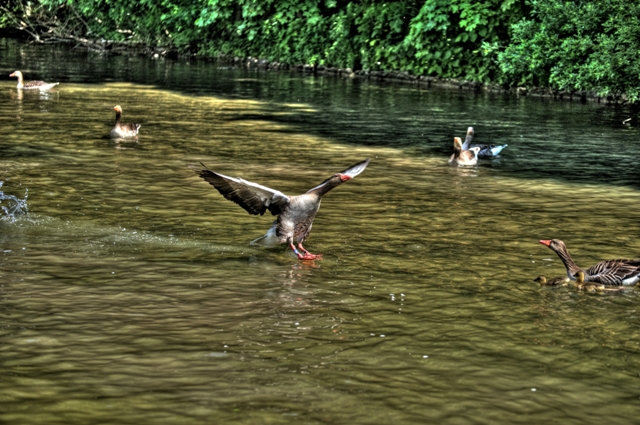
The strategy works, and clearly he can swim underwater much faster than his pursuer can on the surface.  Realizing this, our attacker changes tactics and tries to catch up with a quick flight and a divebomb.


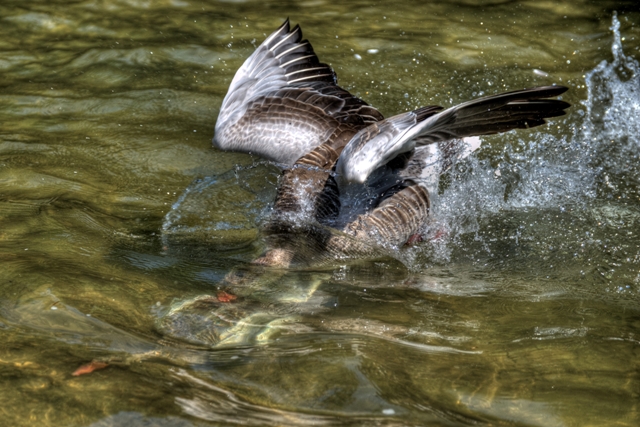
And...he fails....


But decides to give it one last try!! (you can see the other one still underwater, below his left wing)


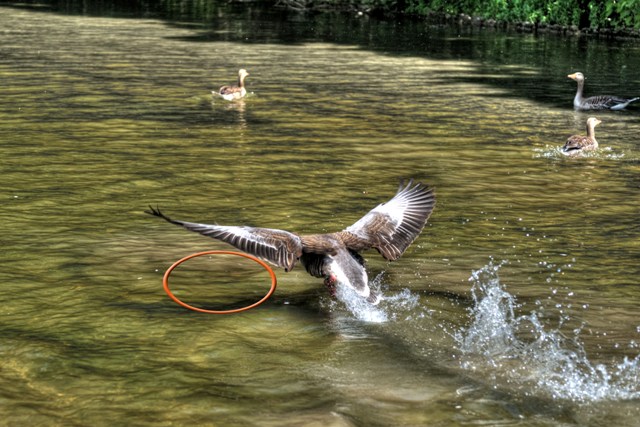
Finally he gives up on the chase


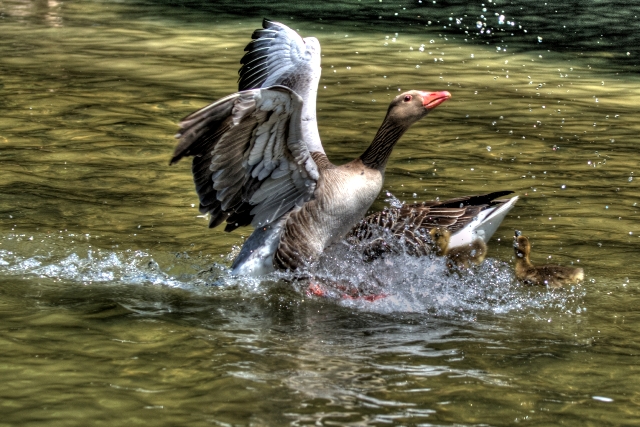
and returns to his woman and children...


...with a big spash! 


We could never figure out what started the attack - it seemed unprovoked to us, but we don't speak goose very well. All I know is that I'm eternally grateful I'd set the camera to shutter priority. It's the only way to get decent shots of things that are bundles of endless, unpredictable energy...like baby ducks and silly geese.

Thursday
Jun022011

Tafelspitz - Adventures in Austrian Cooking

We’ve enjoyed quite a variety of Austrian food, both here in Bavaria and on trips to Vienna.  And, in southern Bavaria and northern Austria, there can be a bit of an overlap… kaiserschmarm, schnitzel…are they Bavarian or Austrian??? It quite depends on who you ask, and I’m not going to touch that controversial question! 

But there are a few dishes we can all agree are classic Viennese.  Wienerschnitzel, of course tops the list, as the name simply means “Vienna-style Schnitzel”.  And there’s one you might not have heard of outside of the German-speaking world - Tafelspitz.

On a side note, Tafelspitz is one of those dishes that you would not order off of the English menu in Germany or Austria.  The translation just sounds perfectly terrible, as unfortunately do many translations of German dishes. Tafelspitz will most likely be described on the English menu as “Boiled beef tritip” or “Boiled silverside of beef.” Not so appetizing a description, but you would really be missing out not to try it.

First, it’s basically a beef brisket cut, not some strange piece of animal…I use the tafelspitz cut to make brisket tacos and it's becoming a favorite cut. Second, while it is boiled, it is not rubbery and nasty. Quite the opposite…tafelspitz comes out like a perfect slow cooked piece of roast – flavorful and falls apart with the touch of a fork. You can see below how the meat would just crumble into shreds. Yum! 


It’s also a dish that can be served both as the authentic, multi-course dinner – really more of an experience than just a meal – or as a simple, hearty homemade dinner. It all depends on how authentic you want to be and how much time you’re willing to invest.

We tried our hand at making Tafelspitz this weekend and it was quite a tasty surprise. Whenever I cook something like this (or brisket tacos, pork shoulder, or goulasch…) I’m always a bit afraid I’ll get a big rubbery hunk of meat rather than fine shreds. And usually I'm shocked (in a good way) with the results.  I think my wonderful giant Le Crueset pot helps things out - I usually turn the stove down to the lowest level, cover it and leave it for hours to get perfect results.

There are various recipes out there, all with conflicting info. So we cobbled together our own simple home version from about 10 other recipes and made a few simplifications. We wanted tasty food, not hours in the kitchen.

So here’s how to make authentic Tafelspitz, as well as how to make a simpler version at home.

For the real deal, visit Plachutta in Vienna, and be sure to make a reservation.  While it is one of those restaurants that all the guidebooks recommend, it’s one that is also authentic and loved by many residents as well. Don’t skip it just because it’s famous – it really is great food and worth a visit.


First, the Ingredients:  

     
Authentic (feeds 4-6) Simplified (serves 2)
2 kg Tafelspitz (in 1 piece if possible) 500g Tafelspitz
750g beef bones (cut and with marrow) 3L beef broth
4-5 L water  
3 carrots 3 small carrots
1-2 parsnips 1 parsnip
2 large onions 2 medium onions
few stalks flat parsley few stalks flat parsley
2 leeks 1 leek
1 small celery root 1/4 celery root (or small one)
3 bay leaves 2 bay leaves
1 Tbsp black peppercorns 16 black peppercorns
2 juniper berries 10 red peppercorns (optional)
chopped chives (decoration)  


In Germany, you'll find something wonderful in the produce section.  It's called Suppengrün ("Soup Vegetables"), and is the bundle of veggies you need to make soup broth. So, it includes already for you, the main ingredients. And you don't have to buy a whole, huge celery root that you won't fully use.


Parsnips ("Pastinak" in German) were an ingredient I'd not used before. Interestingly, the ladies at the checkout counter were not familar with them either, so I explained that they were sort of like a huge white carrot. Which, OF COURSE, made us put them side by side to test out that unproven thought. From the cross section, they definitely look like a carrot relative. The taste is similar, though the parsnip has a more subtle carrot taste and a slightly spicy aroma. And they're a little harder to bite than a carrot. But the taste is very mild. Parsnips cooked will take on the flavor of whatever you are using to cook them.


Preparing Tafelspitz:

And now the preparation: Though it's a fairly simple dish to make, it needs 3-6 hours to actually cook.

 
Authentic (feeds 4-6) Simplified (serves 2)
              Cut onions in half (do not peel) and fry cut side down until slightly blackened.
Fill pot with water Bring broth to a boil, add all ingredients except for carrots and parsnip (or any others you plan to eat)
Wash bones and meat, place in water
                                       Add more water to cover meat if needed
Add peppercorns, bay leaves, and berries and bring to boil  
Reduce to low, cover, and simmer 3-4 hours Reduce to low, cover, and simmer 2 hours
                                       Periodically skim foam if it develops
           Add remaining vegetables and cook 1-2 more hours covered until meat is soft


At the end of the cooking, you'll have a pot looking like this: 

While the tafelspitz is in the last stages of cooking, you'll want to make the sauce(s) and any sides you plan to serve.

Typical side dishes include potatoes (boiled, or a style similar to hash browns), creamed spinach, and vegetables. We opted for veggies from the soup and tried the potatoes.  For the potatoes, you should boil and peel the potatoes in advance (the previousl day is best). Then grate them into shreds.  Finely slice onions in oil until soft. Then add the grated potatoes, season with salt, and fry until crispy.

Unless you have a desire to be super authentic, I recommend you buy the preshredded potatoes. Here you can buy excellent readymade potato pancakes (Schlemmermeyer kiosks and stores have them here) or prepackaged Rosti (shredded, oiled, seasoned, and ready to cook).  In the US, I would just get some of the frozen hash brown potatoes.

There are a variety of sauce recipes out there, but the two most common (and traditional) are the chive sauce and an apple-horseradish sauce. As I hate eggs and creamy sauces, you'll see the apple-horseradish one here. It's a really nice, light and subtle sauce. Probably it should be ground a little finer than we did, but still it will be more a salsa type of sauce than a creamy, smooth sauce.  

Chive Sauce Apple Horseradish Sauce ("Apfelkren")
2 raw egg yolks 1 Granny Smith apple, peeled & cored
3 hardboiled egg yolks 1/2 cup shredded fresh horseradish
100g bread (remove crust) juice of 1 lemon
200 mL milk cider vinegar, salt, sugar
400 mL oil (not olive oil)  
2 Tbsp chopped chives Puree apple and mix with horseradish
  Add lemon juice (to keep apple white)
Soak bread in milk Season with cider vinegar, salt, sugar to taste
Stir together all eggs  
Season with salt, sugar, vinegar Gravy Sauce
Squeeze out milk from bread and add bread Fry diced onions in butter
Stir mixture while dripping oil into the mix Add a bit of flour, fry another minute
Stir in chives Add some broth from the beef
(or use blender, as you would make mayo) Bring to a boil and add grated horseradish


After mixing together the ingredients for the apple-horseradish sauce, you'll end up with something like this.  


Serving Tafelspitz: 

And then comes the fun decision - how to serve your tafelspitz. Traditionally there are two main ways:

1) The entire pot (usually copper) is brought to the table and guests serve themselves out of the communal soup pot. 

Here, you would remove meat from pot. Remove fat and slice meat against the grain. (Restaurants will do it very thinly, but it's tough to do at home without meat falling apart).  Season soup and return the slices to the pot for serving.

2) Guests are served in separate courses, so you'll need to keep the meat warm and moist during the first courses. 

In this case:

Remove meat from pot. Remove fat and slice meat against the grain.  Keep meat warm in oven, making sure to cover with broth and foil to stay moist.  Strain contents of pot to separate veggies and broth (use cheesecloth if needed to achieve a nice broth).  Set aside veggies that you will serve (carrots, parsnip, possibly onion and leek - it's up to you).  Season soup (it's optional to serve with veggies and/or thinly sliced noodles in the broth). 

Tafelspitz Ettiquette:

Traditionally, Tafelspitz then is eaten in the following order: 

Course 1: Soup
Serve soup, either clear broth, or with diced celery root and parsnip and/or noodles. 

Course 2: Marrow
Very traditional - remove a bone from the soup pot. Scoop out the marrow and spread over toasted rye bread to eat. 

Course 3: Meat
Arrange sliced meat on a deep plate or soup bowl. Pour some broth over it, season with sea salt, and decorate with chopped chives. Usually served with the cooked vegetables, accompanied by crispy potatoes, boiled potatoes, and/or creamy spinach. Serve with chive and/or apple-horseradish sauces.


While I think it's important to know the authentic way, it can be simplified easily into a really enjoyable hearty dinner.  Since there was a nice small piece of Tafelspitz on sale yesterday, I decided to try an even simpler method -

This time I boiled 2.5L (around 9 cups) of beef broth, using the powdered version of broth. I added 1 onion cut in half (with skin on), around 450g (1 lb) piece of Tafelspitz, 1 bay leaf and a tablespoon of a mixture of ground szechuan and pink peppercorns. Then I turned the heat down to low, covered, and let cook for 3 or 4 hours. Again, it turned out perfectly, and with a very nice roast beef flavor.  Next time I'll throw in some small potatoes from the beginning to cook and absorb the flavors. The entire process took about 10 minutes of active work, and made a great lunch plus leftovers!

Tuesday
May312011

Experimenting with HDR Photography

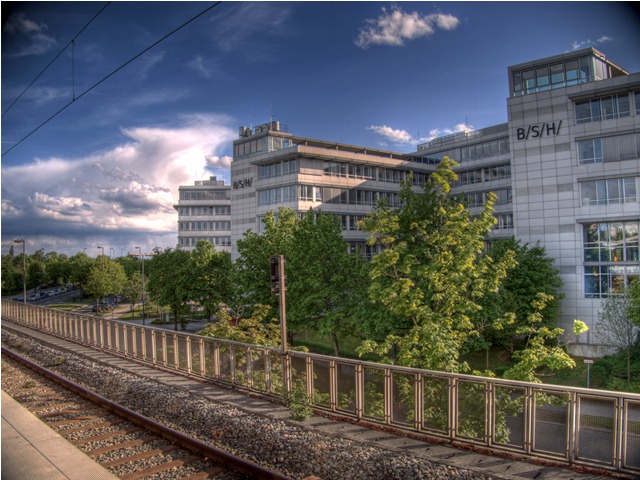
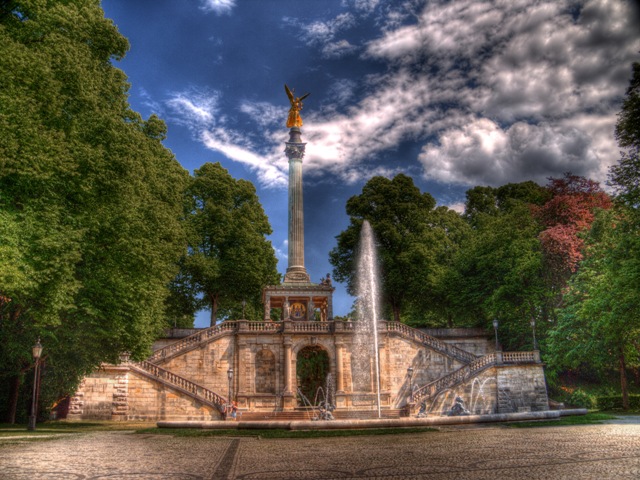
You may have noticed recently that some photographs on Schnitzelbahn don't look quite... "normal".  (Check out the photos of the recent Springtime in Munich post.)  That's because Frau A and I are trying our hand at HDR Photography.  Here's one example (one of my favorites):


HDR stands for High Dynamic Range.  To get a more comprehensive overview, check out this article at DPReview.com, one of the best photography sites anywhere.  Of course, Wikipedia has good info as well.  But I'll try to summarize here...

It's the Catch-22 of sun vs. shadow:  On a bright day, we take a photo of something but the sky is ruined.  Exhibit A:

What happened?  Before taking a shot, the camera meters a scene -- analyzes the amount of light that will be let in.  It uses metering to choose the aperture and shutter speed for a shot.  In this case the trees came out OK, but even at 1/200th of a second we got too much light from the clouds (they were overexposed, or "blown out").

We can tell the camera to meter on the clouds, either manually or just pointing the center of the frame at the sky... but then the opposite occurs.  Exhibit B:


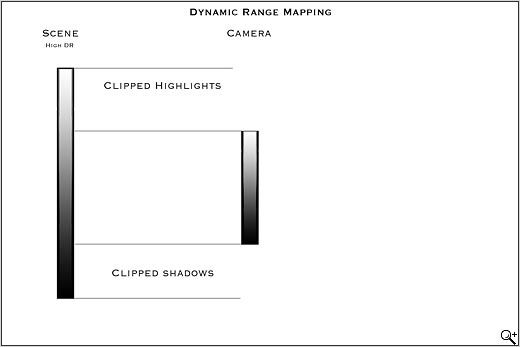
Now the clouds are better, but trees and some brick are way too dark.  Why can't the camera capture both the bright highlights and the darker shadows?  It's a technical limitation:  the sensor (or, previously, the chemical film) simply cannot handle that range of luminance.

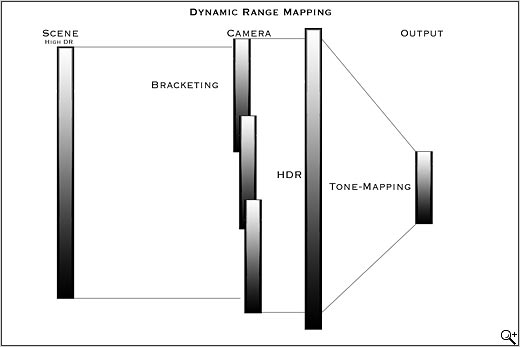
DPReview.com visualizes the problem like this:

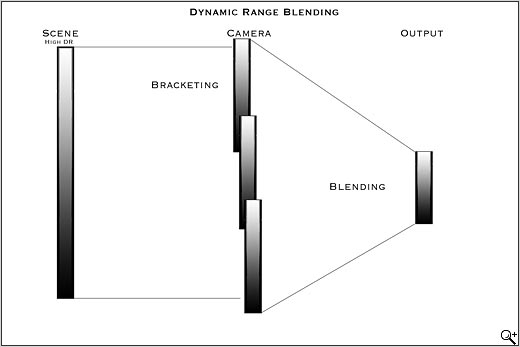
One of the first techniques to get around this problem was called exposure blending.  Logically, we would want to take multiple photographs with different exposures (often using the bracketing function in today's cameras) and combine them to get the "best of both worlds".  DPReview visualizes it this way:


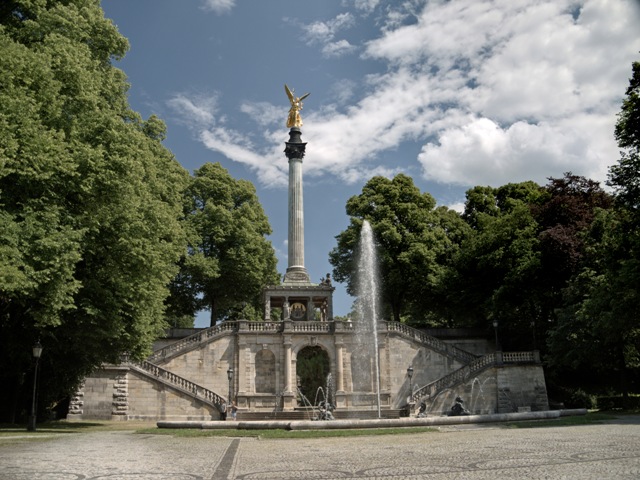
Exposure blending can be done in a number of different software programs like Photoshop, and was possible with chemical film as well.  (Of course, moving objects will appear at different places in each exposure, but there are techniques to deal with this "ghosting" too.)  This solves the exposure problems we had before, and the output is pretty realistic:

A newer technique is called tone-mapping, which was not possible with chemical film.  In this technique, a digital HDR image is created from the bracketed exposures.  This file has so much dynamic range that it cannot be displayed correctly on any output device (computer monitors, printed out, etc.)!  Software is then used to set the parameters on how this 'super-image' is translated into to something we can display and print.  DPReview visualizes it like this:


What is unique about tone-mapping (vs. exposure blending) is that it can work "locally".  Previously, we could change the global contrast within a photo, but tone mapping can adjust how neighboring pixels relate to each other as well (local contrast).  This gives photographers must more flexibility in crafting the final, viewable output from the huge range of luminance and color stored in the HDR file.

Within this flexibility, the results can range from mostly realistic...


... to "painterly" or "grungy" output that extends to the surreal:


You will see a lot of discussion and passionate opinions from photographers on this topic.  Some don't like the unrealistic results while others love the artistic, other-worldly potential.  One of the most well-known HDR photographers is Trey Ratcliff, whose site Stuck In Customs has stunning photos.

Perhaps you've read my prior post on the Olympus Dramatic Tone "art filter"?  How do these compare?  The dramatic tone art filter appears to increase contrast and apply an exposure curve -- these are applied globally.  Tone mapping can operate locally and be more precise.

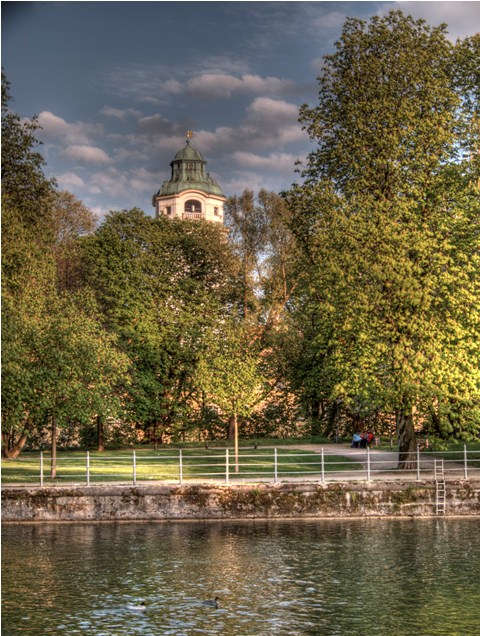
Below are two similar images, taken moments apart.  The first is with the Olympus Dramatic Tone art filter, the second with 5 bracketed exposures and tonemapped.


I still like the Dramatic art filter a lot, but the trees and water simply have more depth after tonemapping.

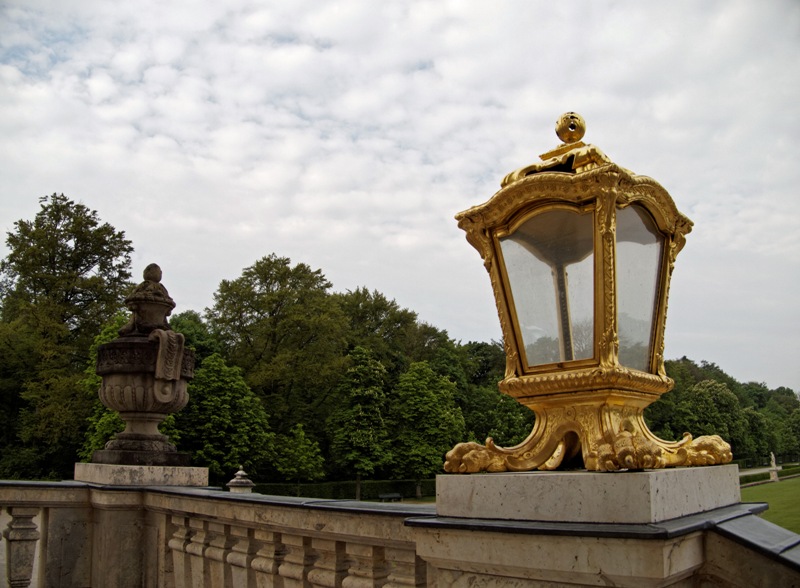
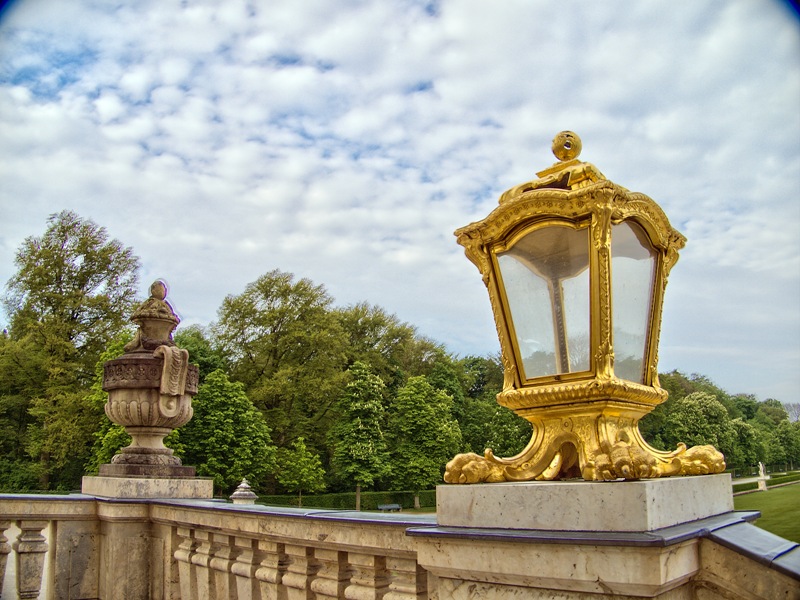
The output can be fascinating, but there are some pitfalls of the HDR process.  Below, you'll see the original camera JPG and then a bracketed/tonemapped image of the balcony at Nymphenburg Palace in Munich:


The HDR output has more detail in the stone & sky, and "pops" out at you, but...

- the trees were moving in the wind, and are blurry in the merged exposure (you can imagine what moving people might look like!)
- the merging process also amplified the vignetting of my lens (upper corners are dark)
- the tone-mapping process resulted in a bluish "halo" around the top of the stone "urn" (on the left) - this is a common tonemapping problem along the sky's border

Although it would be nice to have the software do everything automatically, it just doesn't work that way.  So we have found also that we spend more time post-processing our photos.  There's a lot to learn.

Frau A and I will continue to experiment with HDR photography -- it's been fun so far, and hopefully you like the results too.


Monday
May302011

Google Doodles Quiz - Part 5...Holidays

In this prior post we briefly described Google Doodles and had a quiz.

Now it's time to guess the Holidays that are recognized with a Doodle (often a different Doodle every year):

#1

#2

#3

#4

#5

#6

#7

#8

#9

#10


---------------------------------------------------------------------------------------

Answers below:

---------------------------------------------------------------------------------------


#1    Easter
#2    Valentine's Day
#3    Father's Day
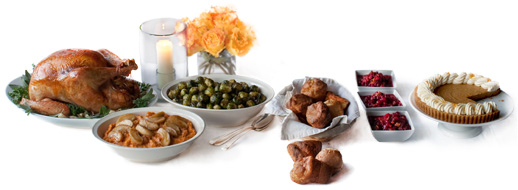
#4    Thanksgiving (designed by Ina Garten)
#5    St. Patrick's Day
#6    Halloween (designed by Wes Craven)
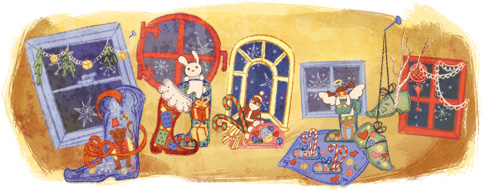
#7    St. Nicholas Day (not Christmas!  Notice the shoes...)
#8    Feb 29th in Leap Year
#9    Dr. Martin Luther King Day
#10  New Year's Day (Roman numerals will tell you the year...)